The Baker’s Blueprint: A Complete Flowchart and Information to Bread Making
Associated Articles: The Baker’s Blueprint: A Complete Flowchart and Information to Bread Making
Introduction
With nice pleasure, we are going to discover the intriguing matter associated to The Baker’s Blueprint: A Complete Flowchart and Information to Bread Making. Let’s weave fascinating info and provide contemporary views to the readers.
Desk of Content material
The Baker’s Blueprint: A Complete Flowchart and Information to Bread Making
Bread making, a seemingly easy course of, is definitely a fancy interaction of substances, methods, and timing. Understanding this course of is vital to constant, scrumptious outcomes. This text will delve into the artwork of bread making, presenting an in depth flowchart to information you thru every step, accompanied by in-depth explanations and variations for various bread sorts.
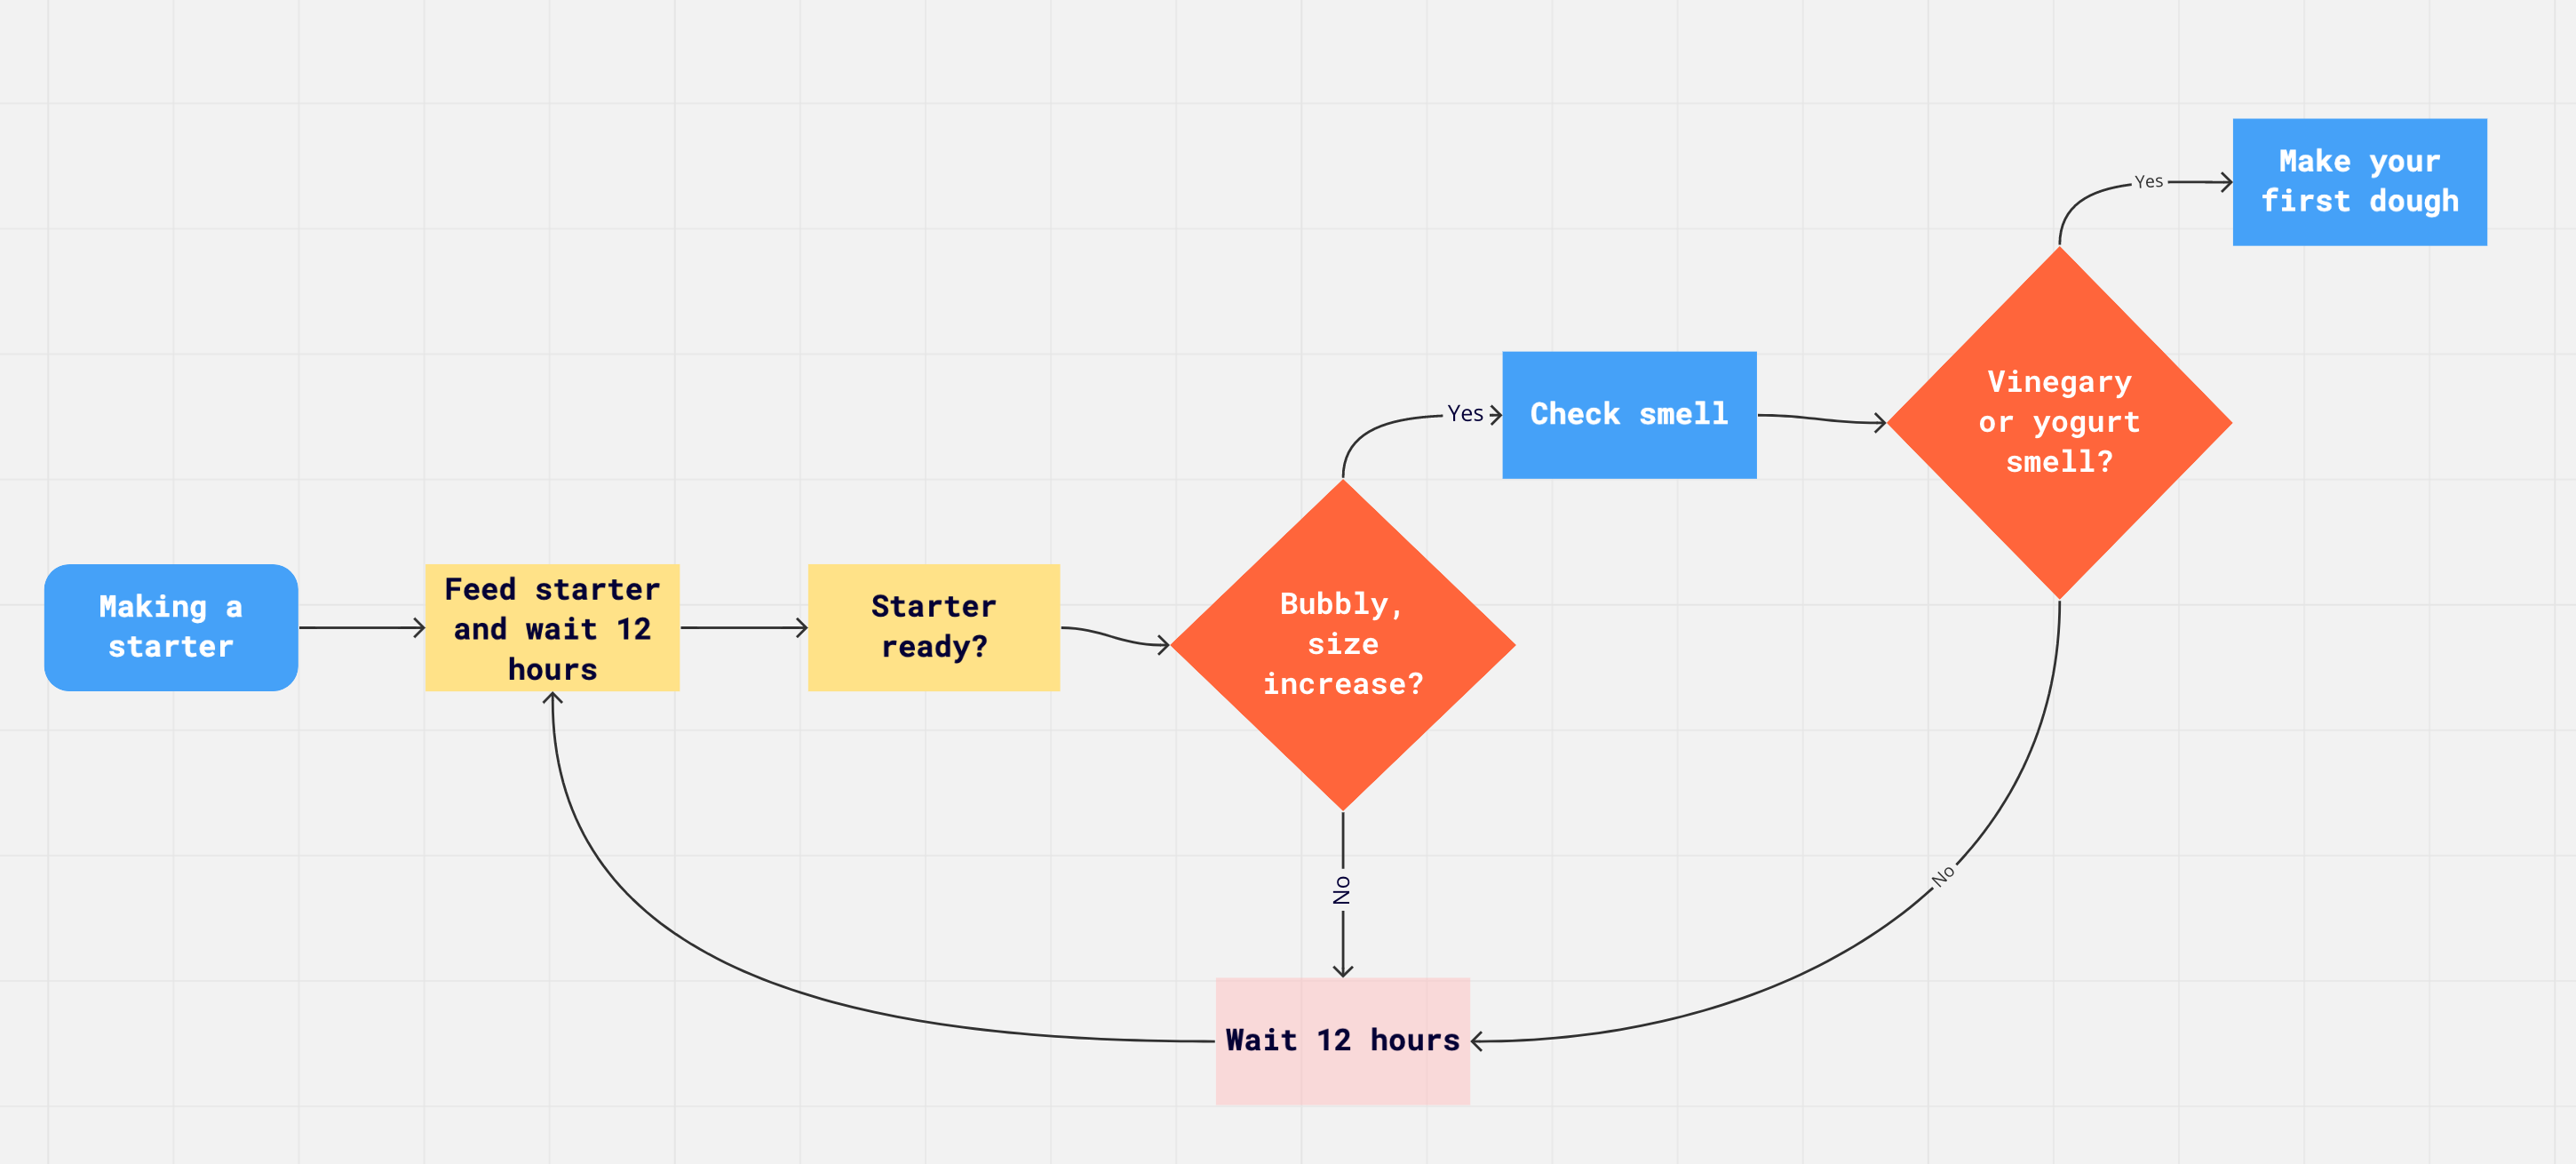
I. The Bread Making Flowchart:
This flowchart outlines the overall course of of constructing bread. Particular steps could range relying on the recipe and sort of bread.
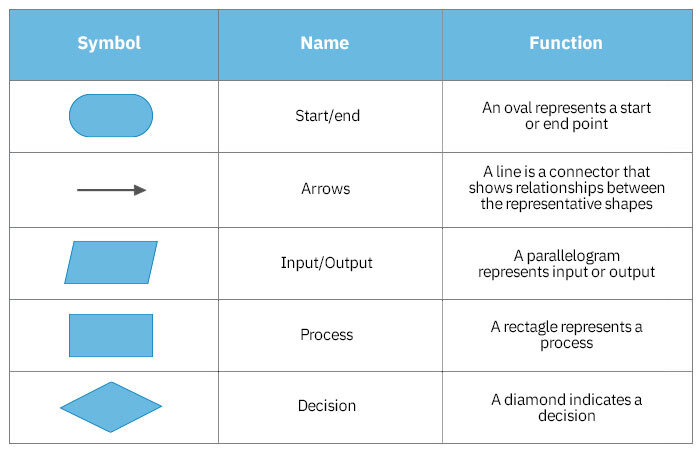
graph TD
    A[Start] --> BChoose Recipe & Substances;
    B --> C[Measure Ingredients Accurately];
    C --> DMixing Technique?;
    D -- Straight Dough Technique --> E[Mix all ingredients];
    D -- Sponge & Dough Technique --> F[Mix sponge (preferment)];
    F --> G[Let sponge rise (bulk fermentation)];
    G --> E;
    E --> H[Bulk Fermentation];
    H --> I[Shape Dough];
    I --> J[Proofing];
    J --> Ok[Preheat Oven & Prepare Baking Surface];
    Ok --> L[Bake Bread];
    L --> M[Cool Bread Completely];
    M --> N[Enjoy Your Bread!];
II. Detailed Clarification of Every Step:
A. Begin: That is the place you start your bread-making journey! Take into account what kind of bread you need to make – sourdough, artisan, white, complete wheat, and many others. Every kind can have its personal nuances.
B. Select Recipe & Substances: Choosing a dependable recipe is essential. Newbies may discover success with easier recipes earlier than tackling complicated sourdoughs. Collect all of your substances – flour, water, yeast (or sourdough starter), salt, and any further substances like sugar, fat, or seeds. The standard of your substances straight impacts the ultimate product. Utilizing high-protein flour for bread is mostly advisable.
C. Measure Substances Precisely: Baking is a science. Exact measurements are important for profitable outcomes. Use a kitchen scale for essentially the most correct measurements, particularly for flour and water. Quantity measurements may be much less constant.
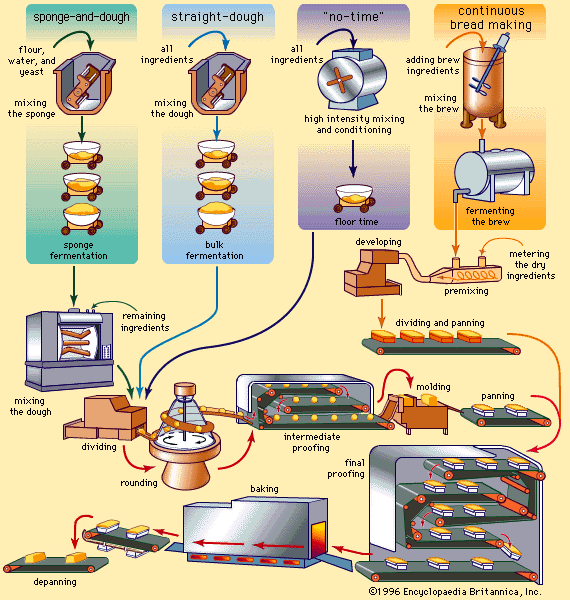
D. Mixing Technique?: Totally different strategies exist for mixing bread dough. The selection is dependent upon the recipe and your desire.
* **Straight Dough Technique:**  All substances are mixed directly.  This can be a easier technique, best for freshmen.
* **Sponge & Dough Technique:**  A preferment, or sponge, is created by mixing a portion of the flour and water with the yeast.  This permits for enhanced taste improvement and simpler mixing.  The remaining substances are added later.  This technique is commonly used for richer breads.
* **No-Knead Technique:**  Minimal kneading is required, usually counting on lengthy bulk fermentation to develop gluten.  This technique is handy however requires extra endurance.
E. Combine All Substances (or Add Remaining Substances in Sponge & Dough Technique): Thorough mixing is important to develop gluten, the protein community that provides bread its construction. Use a stand mixer with a dough hook or combine by hand, utilizing a agency however light contact. The dough must be elastic and barely sticky.
F. Let Sponge Rise (Bulk Fermentation – Sponge & Dough Technique Solely): The sponge will rise considerably because the yeast ferments. This step enhances taste and creates a extra energetic dough for the subsequent stage.
G. Bulk Fermentation: This can be a essential step the place the dough rises after mixing. The size of fermentation is dependent upon the recipe, temperature, and sort of yeast. Throughout this time, the yeast produces gases that trigger the dough to develop. Heat temperatures speed up fermentation, whereas cooler temperatures gradual it down. This course of develops taste and texture.
H. Form Dough: As soon as the dough has risen sufficiently, it must be formed. This includes gently dealing with the dough to create the specified loaf form – spherical, oval, batard, and many others. Mild dealing with is vital to keep away from degassing the dough.
I. Proofing: After shaping, the dough undergoes a last rise, referred to as proofing. This permits the yeast to supply extra fuel, leading to a lighter and airier loaf. Proofing takes place in a heat, humid atmosphere, usually coated with a moist material or in a proofing basket.
J. Preheat Oven & Put together Baking Floor: Preheating the oven to the right temperature is important for reaching an excellent crust. Put together your baking floor – a baking stone, baking sheet, or Dutch oven – to make sure even baking. You may additionally want to arrange a baking spray or parchment paper.
Ok. Bake Bread: Baking time varies relying on the scale and sort of bread. The inner temperature ought to attain the suitable vary (often round 200-210°F or 93-99°C) to make sure it is totally baked.
L. Cool Bread Utterly: Permit the bread to chill fully on a wire rack earlier than slicing. This prevents the bread from turning into soggy and permits the crumb to set correctly.
M. Get pleasure from Your Bread!: As soon as cooled, savor the fruits of your labor! Your selfmade bread can have a singular taste and texture in comparison with store-bought loaves.
III. Variations and Issues:
A. Yeast Sorts:
- Lively Dry Yeast: Generally used, requires proofing in heat water earlier than including to the dough.
- Prompt Yeast: Could be added on to the dry substances.
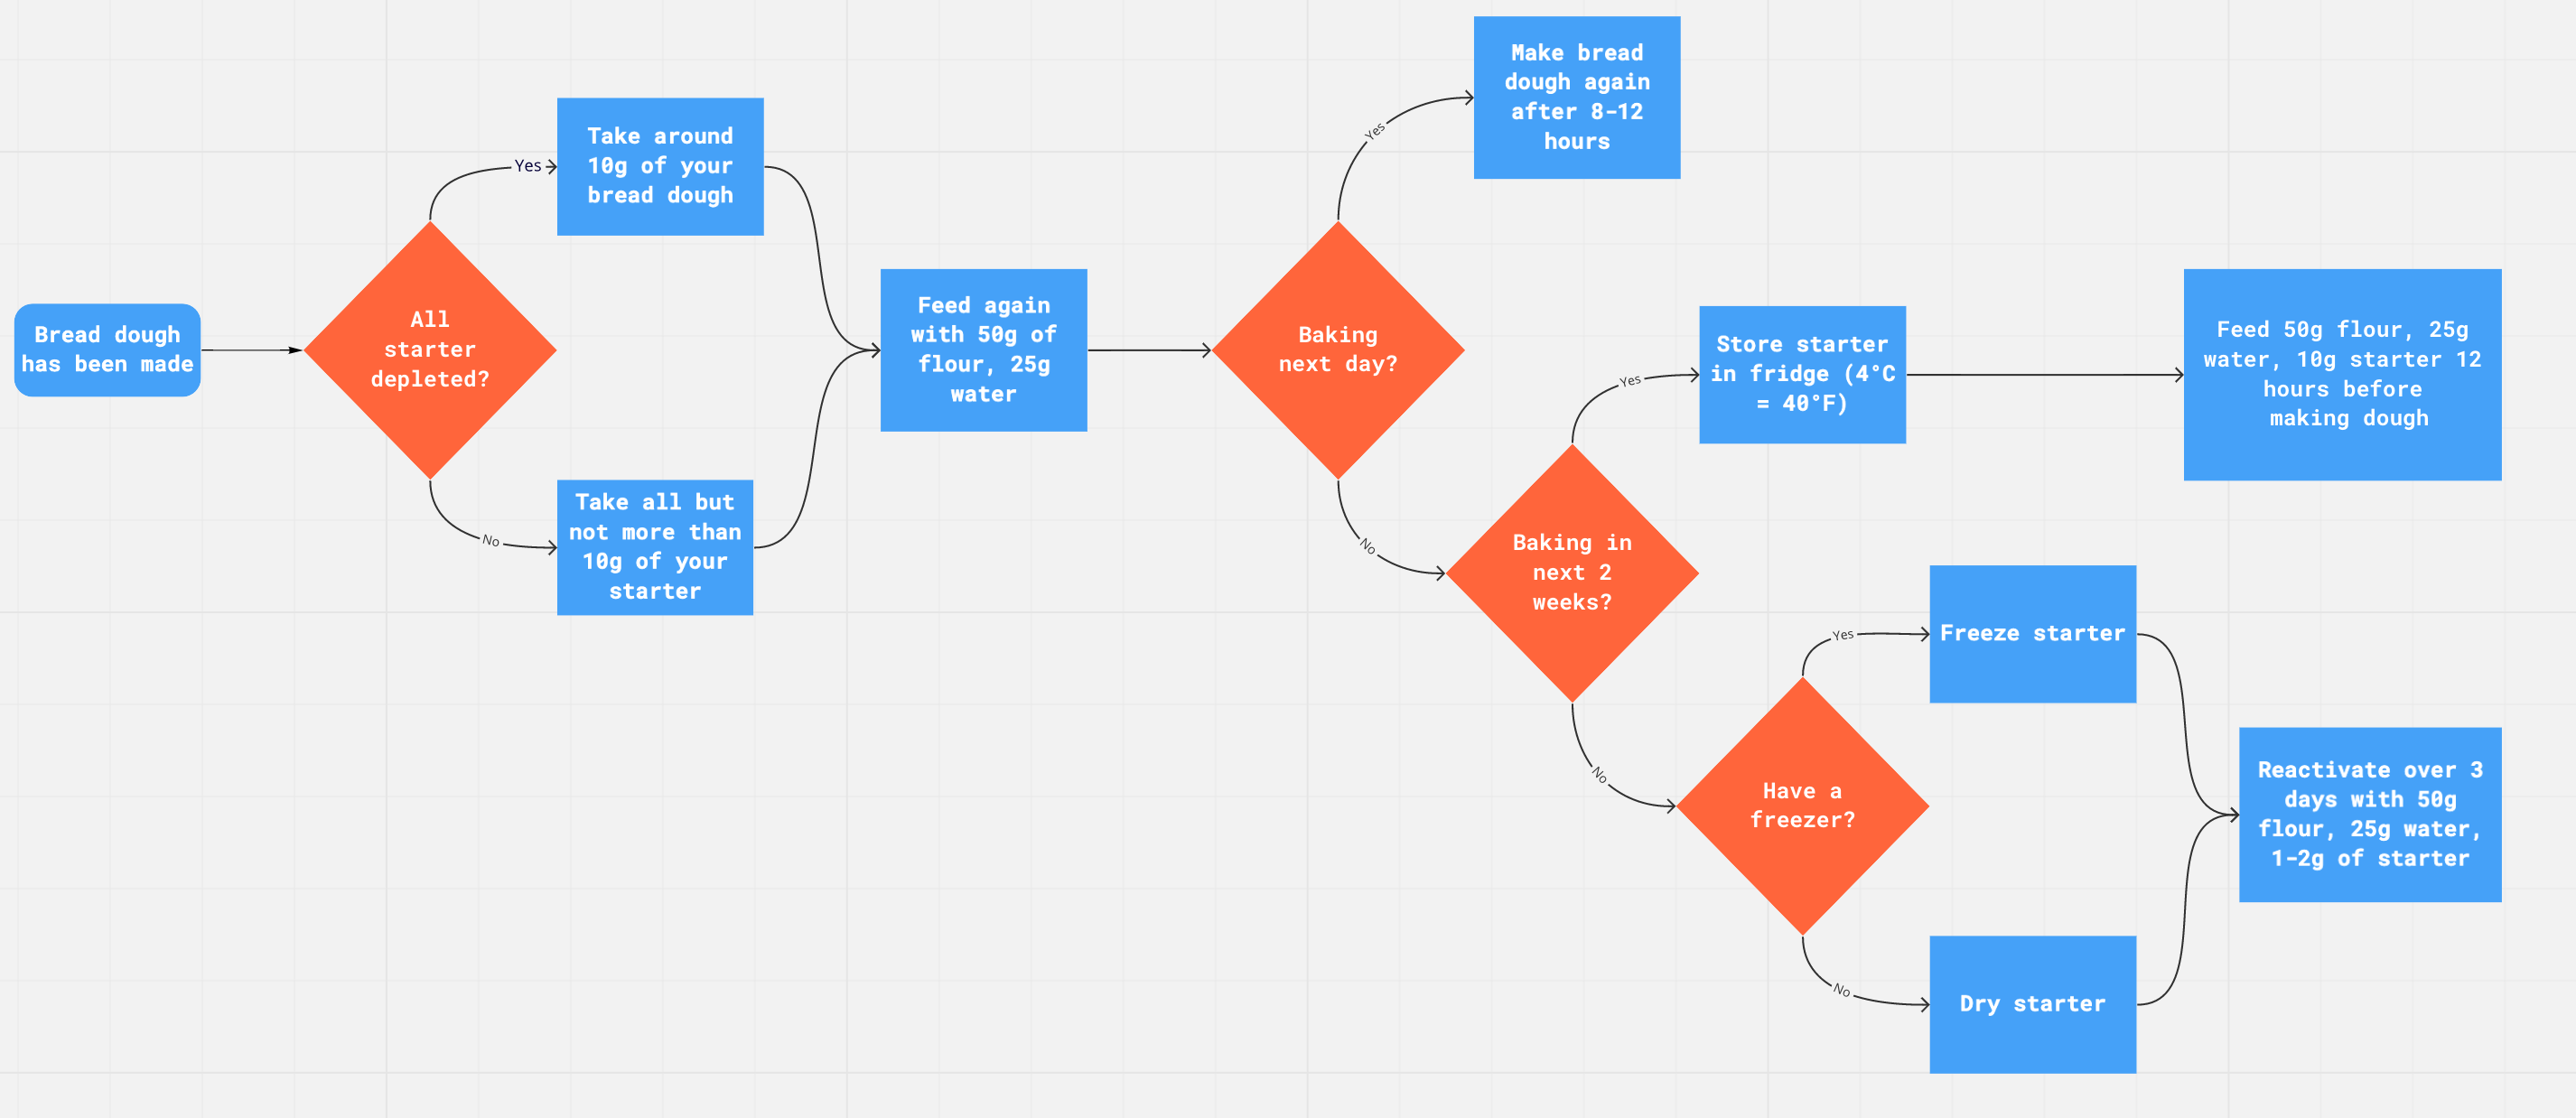
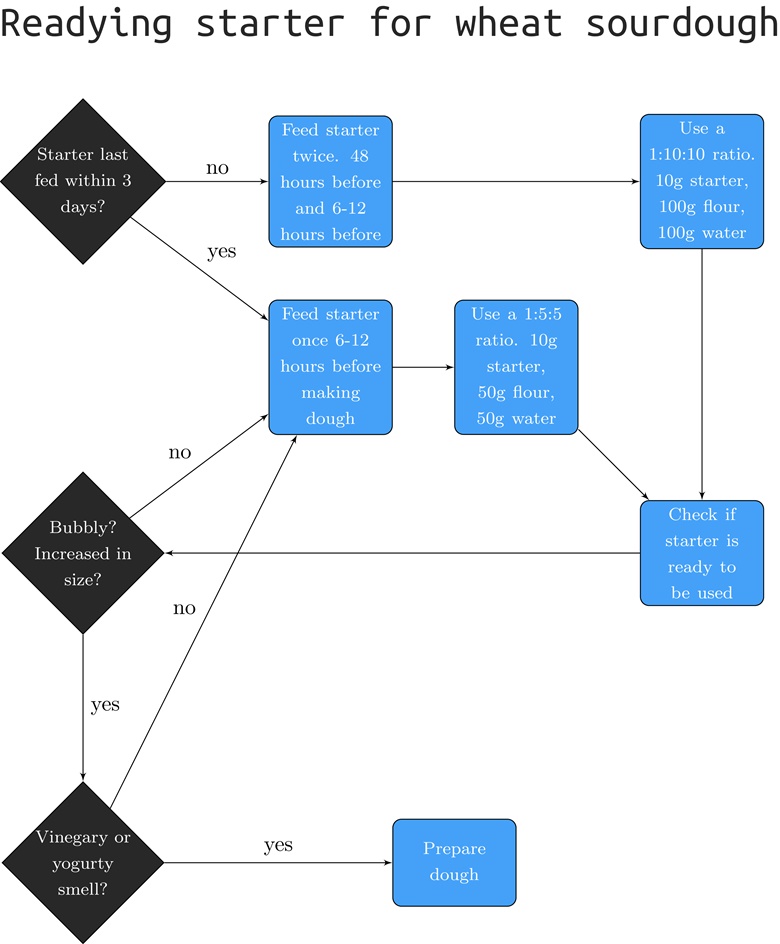
- Sourdough Starter: A reside tradition of untamed yeasts and micro organism, requiring cautious upkeep and feeding. This creates a tangy, complicated taste.
B. Flour Sorts:
- Bread Flour: Excessive in protein, best for growing sturdy gluten.
- All-Goal Flour: Can be utilized, however could end in a much less chewy loaf.
- Complete Wheat Flour: Provides nutty taste and fiber, however may end up in a denser loaf.
C. Hydration:
The ratio of water to flour considerably impacts the dough’s consistency. Greater hydration ends in a wetter, extra extensible dough, whereas decrease hydration ends in a firmer dough.
D. Kneading:
Kneading develops gluten, giving the bread its construction. The quantity of kneading varies relying on the recipe and flour kind.
E. Baking Tools:
- Dutch Oven: Creates a steamy atmosphere, leading to a crispy crust and mushy crumb.
- Baking Stone: Offers even warmth distribution.
- Baking Sheet: A less complicated possibility, however could end in a much less crispy crust.
F. Troubleshooting:
- Flat Loaf: Inadequate yeast, insufficient proofing, or under-kneading.
- Robust Loaf: Over-kneading or inadequate hydration.
- Crumbly Loaf: Inadequate hydration or over-baking.
- Soggy Loaf: Below-baking or inadequate oven temperature.
IV. Conclusion:
Mastering bread making is a rewarding journey. This flowchart and accompanying information present a strong basis on your baking endeavors. Keep in mind to experiment, be taught out of your errors, and most significantly, benefit from the course of of making one thing scrumptious from easy substances. Every loaf you bake will likely be a testomony to your talent and endurance, a scrumptious reward on your efforts. Completely satisfied baking!


Closure
Thus, we hope this text has offered beneficial insights into The Baker’s Blueprint: A Complete Flowchart and Information to Bread Making. We thanks for taking the time to learn this text. See you in our subsequent article!